Friday, May 15, 2020

Rainbow Cards

EASY CARD IDEAS USING MINIMAL SUPPLIES

Today I am sharing some fun and cheery Rainbow cards. These cards were so much fun to make.  I was inspired by several places these week. the first one is The My Favorite Things Challenge Blog. The second  is it's me, JD This is her blog link. You will see all the great cards she made using scraps/strips of paper.

For this first card I followed the challenge sketch over on the My Favorite Things Blog, challenge #488. I used a stamp set by doodlebug designs.  The magical sentiment is from that same set . I used black pigment ink and heat embossed with clear embossing powder.  The enamel dots are from my stash. The paper strips at the bottom are cut and .25 of an inch.


This card was fun to make but took some planning. I drew in pencil lines and made 4 equal boxes on my white card stock to begin with, I then picked out my pattern that I wanted and tried to follow that on the whole card front. In the center of the card you can see that I used the pink strip every time I started a new box.

 I think for next time I will make a file on my Cricut to cut the strips because some of mine didn't come the same size. If you try this card you need to make sure your first strip in each section is really straight. A couple of mine are not and the edges have some sliver pieces and I'm ok with that. I used a rectangle die from Pink Fresh Studio along with a circle die from C.C. Designs as well as an alphabet set from Hello Blue Bird for the letters in the center. Both of these cards are a standard A2 size 4.25 x 5.50 top folding card. The black card stock is #110 weight which makes for a nice sturdy card base.


BIG CRAFTY HUGS, LISA

Tuesday, May 12, 2020

Colorful THANK YOU Card

Good Morning Crafty peeps


 Up on my blog today is a colorful THANK YOU card. This card was very quick and easy to do. I needed a THANK YOU card as 2 of my boys did some work over the weekend for a neighbor. They got paid plus she fed them breakfast and lunch. On top of that she sent the home with cookies as well. Can you believe that? 


I first made the color background using Oxide Inks and my blender brush on Bristol Smooth white card stock. Next I cut out the shadow. Then the word Thank you 3 times in white #110 paper and use Reptile glue. I added the word Thank you to the shadow background. I added foam tape to the back of that. I placed it on a white panel that is 4 x 5.25 I took my scoreboard and made score lines every .25 of inch on the front of the panel for some extra interest.


Big Crafty Hugs, LISA

Monday, May 11, 2020

My Magic Mug


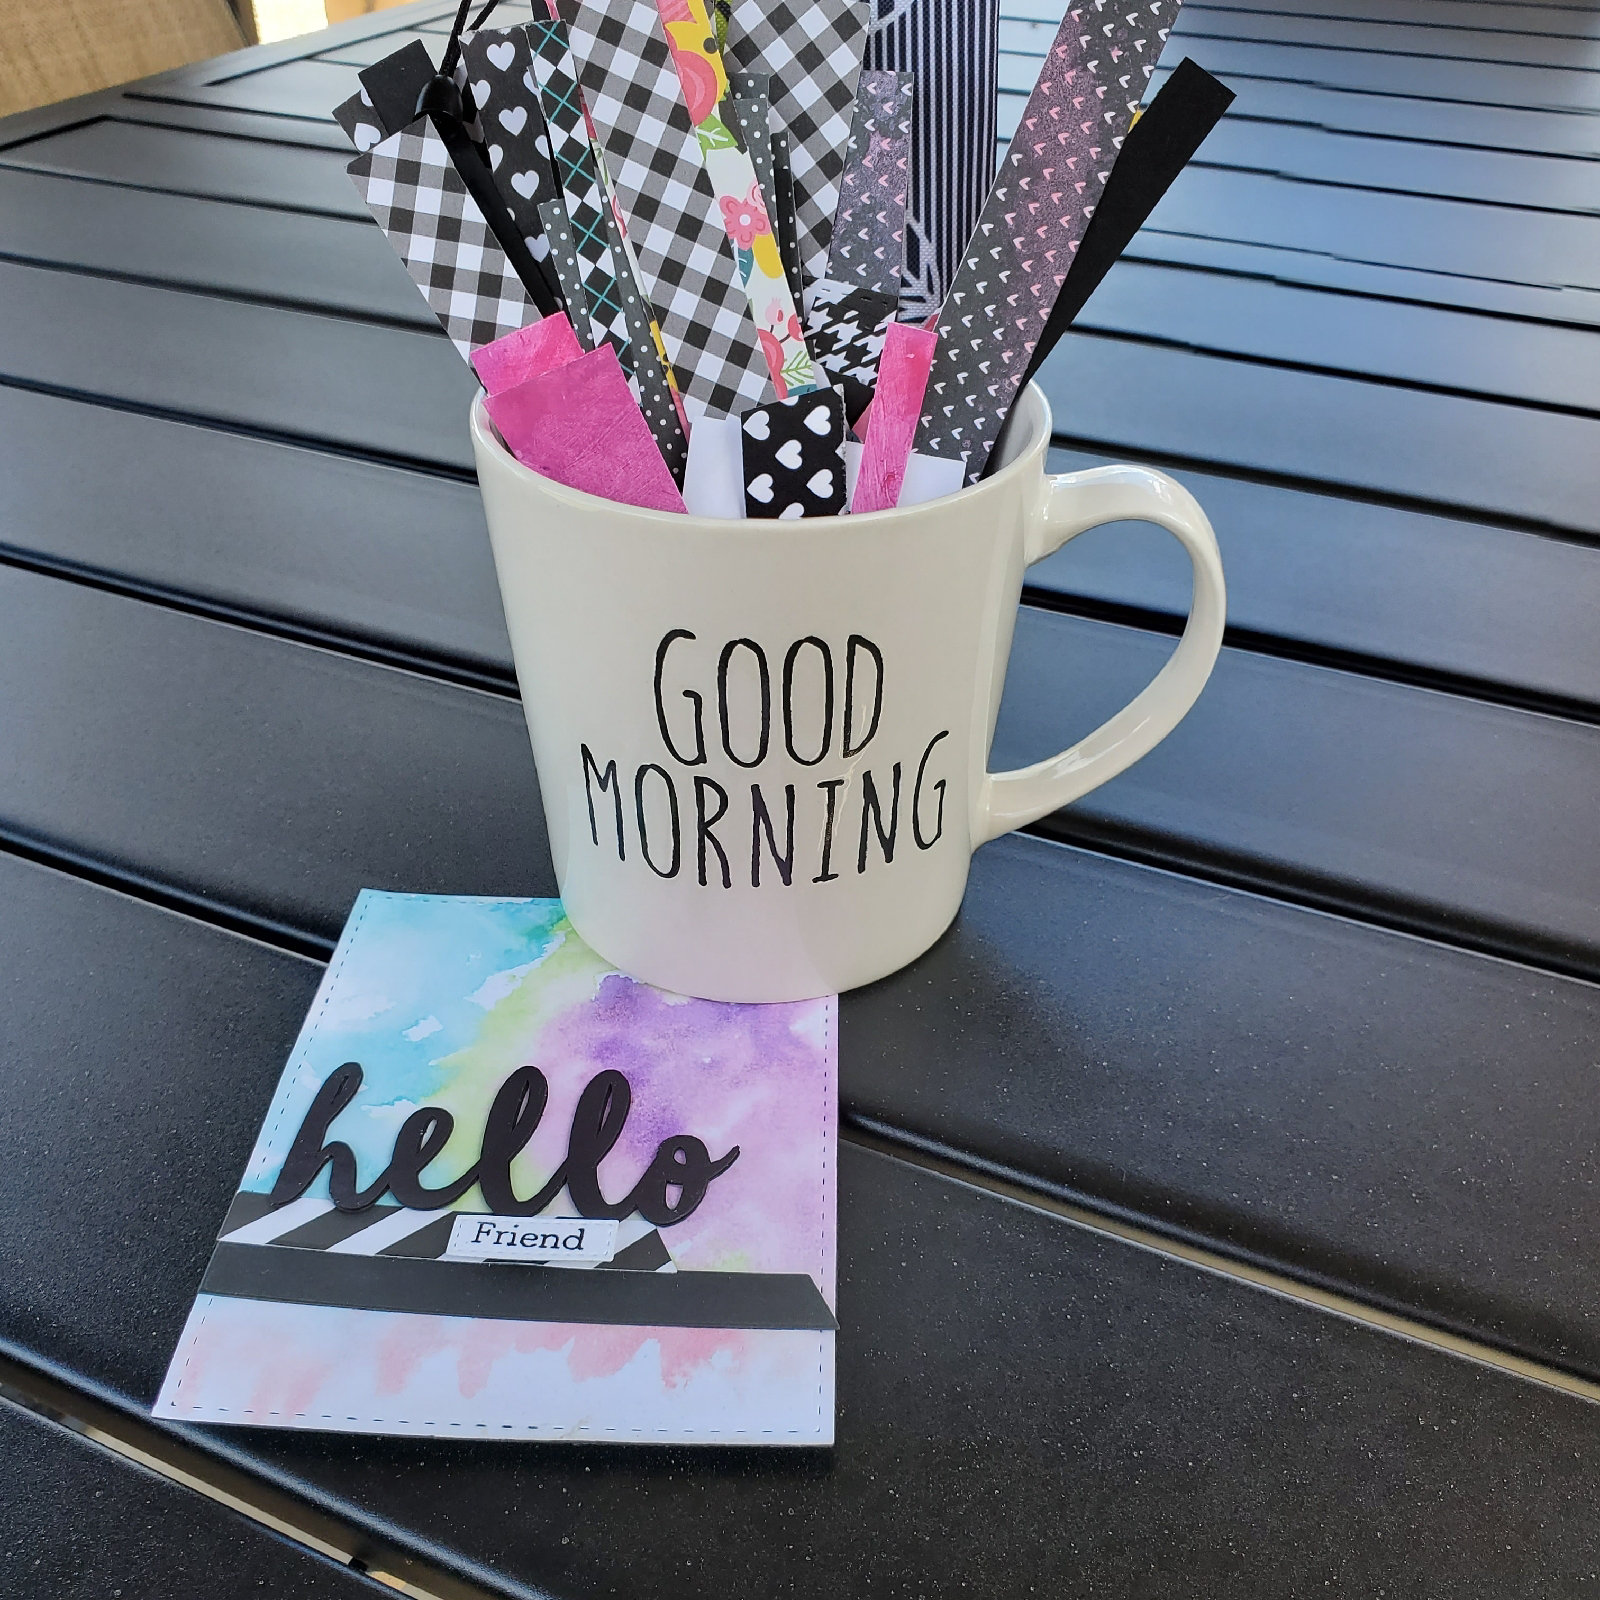
This magic mug was inspired by Laurel Beard on You tube link to her channel here. This magic mug was inspired by Laurel Beard on You tube link to her channel here. This is what mine looks like. I got my Rae Dunn inspired mug at Walmart for less then $3.00. I took some black and white card stock from my stash and cut into straps. I also have word die cuts and image die cuts in there. The opening  at the top is  nice and big to hold lots of fun goodies.


Here is one more picture of the Magic Mug. In this on i have a card front with water colored back ground. All the pieces came from the Magic Mug. Thanks to Laurel I have been having fun digging in my Magic Mug for bits and pieces for my card fronts.

Have a happy crafty day
Lisa

Saturday, April 4, 2020

MADE IN MINUTES

Good Morning

  Here is my card for the current challenge over at AAA Cards Blog. The challenge this week is to make a card that only takes minutes to do. The twist is to use a stencil. CAS Game #162 CAS= Clean and Simple. This is my first time playing at AAA CARDS and it does look like there is a prize for the winner.!


  I knew as soon as I saw this challenge knew  what  I was going to do. I used a stencil  I cut from my Cricut that looks like bricks.  I placed the  stencil over the white card stock  and used Oxide Ink in Picked Raspberry with life changing makeup brushes from Amazon.

  The coffee cup die is from a set by Spellbinders.  For this card I did not use the die that would be the coffee sleeve. The pink heart is from an older My Creative Time die set. I could not find this exact set but will link to the Stitched Sweetheart Dies and XOXO

I then stamped the sentiment which comes from a My Favorite Things stamp set called Grande-Sized Love. I added 3 clear sparkle sequins from my stash. This card took me no longer than 10-20 minutes to make, This would be a perfect card to send to a friend  for a coffee or hot chocolate meet up. I don't drink coffee but love all things coffee themed.  especially for my crafting projects.

Thanks for stopping by today
Happy Crafting
Lisa

Saturday, March 28, 2020

Party Like a Flock Star


Good Morning,

 Today I am here with another fun challenge for The Color Throwdown blog. Color throwdown #586.
 The challenge is to use Pink, Purple, and White with neutral colors as needed. Please head on over and check out all the awesome entries.


 This is the card I made for this challenge. I went with  a fun and bright flamingo theme. I used several stamp sets that are in my stash that had not been used or not used in a long time.

Painted Stripes By: Essentials by Ellen

Fa la la la Mingo By: Maymay Made It
Flamingo Together By: Lawn Fawn 


The flamingo on the left, palm tree, foliage at the top, and sentiment come from Fa la la la Mingo stamp set. The flamingo on the right  comes from Flamingo Together and  you guessed it the stripes come from Painted Stripes stamp set.

Here in this picture below you can see how I used my stamp platform to line up my stripe stamp . It's not perfectly even, and I'm ok with that; because I used oxide ink I had to stamp each stripe several times. This is where a stamp platform really comes in handy. I would not want to try this with just a clear block.


 My flamingos were stamped and heat embossed then cut out with the Brother N Scan  Dx225. I love this machine but that is for an other blog post. I also heat embossed the sentiment and used foam tape behind the frame. As a finishing touch I used small black gems and sparkly clear sequins. Once you do the stripes this card goes together fairly quickly.!

Friday, March 27, 2020

Easy Faux Watercolor Cards

 Good Morning,

I am entering this card  into a challenge over at Freshly Made Sketches blog. There is lots of inspiration over there. Please go and check out all the entries. Here is the sketch


 Today I have some easy faux watercolor cards for you. All you need is some Oxide Inks or water reactive ink, stamps of your choice,  black ink, clear embossing powder, heat gun, shimmer spray optional, black paint, glass mat or craft sheet  and a spray  bottle with water.

 My stamp sets are from Technique Tuesday.  I used Bowl Bouquet, Delightful Daisy and Lotus for the sentiment. The doily die is from In Love Art shop and is a set of 3.

                                                 This is what the finished card looks like.

The colors I chose to use are Broken China, Peacock Feathers, Fossilized  Amber and Lucky Clover.  You can see them in the 2 pictures below. The second picture is how I put them on my glass mat. You'll want to use a craft sheet or class mat for easy clean up.


Then I spray the ink with water to make it puddle.  Make sure the colors you pick don't  make a muddy  brow color when they mix. You may want to test this first.Then I put my paper down in the puddle to soak up the ink. You can see that in the picture below.

Then l take my paper up and look at it to see if I like it or want to add more color. I use my heat gun between layers to dry it. The Oxide inks layer well with bottom colors showing through.  I keep doing this step until I'm happy with the out come. The next picture shows the way my doily looked when done. I did this step for my background panel too.

Next I heat embossed my image and sentiment, and added black paint splatter to the background panel. Shown in picture below. I did these assembly line style. I did all die cutting,  then the ink smushing  technique, the the black paint splatter,  the heat embossing and then assembly of  the cards.


                   One more picture of the final card with a different image for you to look at.

Thank you for stopping by.
Have a crafty day.

Lisa

Sunday, March 22, 2020

Galatic Friends


 This set is called Galactic Adventures the Sequel, and it comes from Kindred Stamps. The bottom card is from Pinterest and was my inspiration card using this same set. The top 3 pictures are my own card. I used Seedless Preserves, Broken China and Faded Jeans Oxide ink along with  blending brushes for the background. I also used a Jelly Roll #8 white gel pen to make the stars and added a few white enamel dots

I colored the images with Arteza colored pencils and blended with Gamsol. I then used my Brother Scan it cut to cut the images out. I used  #110 lb card stock size 4.25 x 11 scored at 5.5. This makes an A2 size card when folded. To get this cut your 8.5 x 11 card stock on the 8.5 side at 4 and you will now have 2 cards.

I mounted a grey panel 4.25 x 5.5 on the black card stock and my ink blended panel on top of that. I then added my stamped images. The sentiment comes in the stamp set and is heat embossed on white card stock. I then matted the on black. I add foam tape to the back and adhered to front of my card.